Da 'woanders' gerade jemand seinem Gerät einen Ersatz-HT verpasst hat, der mir nicht gefiele, hier mal Rep.- Tipps, wie man
stat. Lautsprecher reparieren kann :
http://www.ppinyot.com/E/electrostatic_tweeter.htm
Da die Website schonmal wech war (nun ist sie wieder da...) habe ich sie hier mal 'plain text' gesichert :
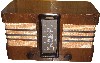
EMUD :
The first step was to remove the speaker from the cabinet. You can see the two contacts on the tweeter. One contact is the actual metal perforated grill of the speaker (ground). The other is a loose and floppy silver contact (positive 170 volts DC through a 100k resistor! It will bite you, Ouch!).
With so much DC on this speaker one must ensure cleanliness and the integrity of the internal components do not create a short circuit. The 100K resistor would protect this particular radio but this is no guarantee in other radios.
A Dremel Moto tool with a sandpaper disk made quick work of the formed plastic retainers that hold the assembly together. Note: Leave as much plastic as possible. It will be re-flared with a hot soldering iron to hold the assembly together.
An alternative is to drill out the rivets and use tiny machine nuts and bolts to hold the assembly together. Use Glipt, Loctite or old fingernail polish to lock the nuts to the threads. This assembly vibrates since it is an electrical to physical transducer to vibrate air waves.
This picture shows the internal components of the tweeter.
bullet Lower right is the silver contact that has significant corrosion on it.
bullet The upper left is the delicate extremely thin plastic like membrane. It has a conductive coating on one side that is press fit to the silver contact mentioned above.
bullet The silver item in the middle is the perforated grill. It has a deteriorated pieces of foam on the right side that pressed the membrane to the silver positive contact.
bullet The lower left brown item has some dry rotted foam that presses the membrane against the perforated grill.
Problem identified - Deteriorated Foam.
This was the main problem. Deteriorated foam that causes a poor or no "press fit" connection between the silver contact and the membrane.
Seen here is the corroded contact, the deteriorated piece of foam and the cellophane tape that I think insulates the positive contact from the negative perforated grill.
I have seen this type of foam stain, corrode and ruin what ever it is in contact with including dial scale printing.
This was the second problem with the speaker. The foam corroded or coated the silver contact with crud.
Burnish and clean the silver positive contact with fine grit sandpaper.
This was to a lesser degree, the third problem. This foam backer was not pressing the membrane close to the negative electrode (the perforated grill).
Cut out a new replacement piece of foam that holds the membrane against the perforated grill
Reassembly - Put it back together
Assemble in order:
bullet Perforated Grill
bullet Electrical tape
bullet Double sided sticky foam tape from Radio Shack.
bullet Membrane. Be careful to maintain the orientation of the conductive side true to the disassembly.
bullet Place the silver positive contact in the plastic cone.
bullet And replace the brown deteriorated foam with your new piece that you cut or fabricated.
bullet Press the assembly together and flair the plastic rivets with a hot soldering iron.
This picture shows the assembled speaker. The new foam piece is the other half of the foam inside the speaker. It was twice as thick as the original. I used an X-Acto blade to slice the thickness in half.
Also seen is:
bullet Electrical tape to replace the cellophane tape.
bullet Double sided sticky foam tape to press the silver contact to the membrane and
bullet The deteriorated foam used to press the membrane against the perforated grill. The brown foam broke apart into powder when I picked it from the speaker structural cone.
The rebuilt tweeter on the Emud sounding Great! The output is significantly greater (louder) than before it was rebuilt as compared when wiggling the previously loose positive contact.
I can't properly reproduce the sound on this web page so a hearty "Thumb-up" will have to do.
GRUNDIG 3035 w/3D USA Electrostatic Tweeter Repair
This is a flat square tweeter from a Grundig 3035. It had a corroded contact that is press fit against the conductive vibrating membrane. Disassembly and sanding off of the corrosion where the contact touches the membrane is all that was needed.
Use a hobby grinder to take off the tops of the melted plastic rivets Test the side with out lead wires by prying up. You may need a little more grinding to remove the retainer side with the lead wires. Lay all the part out on your bench. The white material seems to be wool. That is used to keep the conductive membrane close to the metal screen. The wool is much better than the foam rubber.
Identify the corroded contact the is press fit against the membrane and a strip of foil seen on the right of this picture. Use sand paper or your favorite burnishing technique to remove the corrosion. Reassemble the unit and test before melting the rivets. Melt the rivets, use glue or hot melt glue to hold the tweeter together. Sounds Great!
This is a Telefunken Opus 8. A beautiful sounding radio utilizing push pull EL-84 output tubes driving six speakers. Two of the six speakers are electrostatic speakers driven off of the plates of the final audio output tubes. The electrostatic tweeters are serviceable on the bench or in the cabinet. The electrostatic speaker restoration is featured below.
Be Gentle. Open up the assembly. There is the deteriorated foam. It turns to crumbs when touched. Brush it off. Gently remove the diaphragm. Mark up a new section of foam rubber. Clean the tarnish from the press fit contact points.
Clean the diagram contact point only. You can rub off the metal leaving unconductive plastic. I rebuilt the left side tweeter in the cabinet. 'Brush off the old foam rubber. Insure it is clean no rust.
Separate the insulator and the diaphragm. Hot wire cut a new ring of foam. The 100w lamp is in series with a length of salvage wire wound resistor wire. Use rubber cement to secure the new ring. Glue a little square of foam rubber opposite of the lead wire contact to insure good contact with the diaphragm.
Reassemble the diagram lining up the area that you cleaned with the contact. Push it all back together. Twist lock the tabs. Alligator clip lead the tweeters to the chassis for a test! Check you work. You will not hear overwhelming treble like modern tweeters. The German engineers designed this tweeter to compliment the whole acoustic compliment.
Looking good. Sounding great.
Oder so :
http://www.razyboard.com/system/morethread-statischehochtoenervomtefifont573-rundfunkmuseum-1375753-4347396-0.html